How To Set-Up Your Desktop Theme
on windows 10 & 11
Customising Your Icons
important first step
Save Your icons!
Wherever you save your icons (the .ICO files), they will need to remain there while you are using them.
Save your icons somewhere that makes sense for you, I recommend creating a dedicated folder that you can easily find later.
If you ever remove, rename or change the location of your icons, all the apps/folders you have customised will revert to their original state or appear with a placeholder blank icon.
Which icon would you like to customise?
-

Folder icons
customise your foldersThese are the icons displayed on folders in File Explorer or on your desktop.
-

App icons
customise your appsThese are the icons for the shortcuts to programs or applications, usually found on your desktop.
-

Desktop icons
customise your desktop iconsThese icons are your Computer, Recycle Bin, Network, and User File icons.
-

Taskbar app icons
customise your taskbar iconsThese icons for shortcuts to programs or applications on your taskbar.
Folder Icons
step 1
Locate the folder you want to customise in File Explorer, or on your desktop.
step 2
Right-click and select properties.
step 3
Navigate to the custotmise tab.
step 4
Click Change Icon…
step 5
On the pop-up, click browse… and navigate to the folder you saved your .ICO files in.
step 6
Now choose the perfect icon for your folder and click open, then click ok on the pop-up windows below.
step 6
Now choose the perfect icon for your folder and click open, then click ok on the pop-up windows below.
App Icons
step 1
Find the shortcut that you want to customise on your desktop or in a folder.
step 2
Right-click on the app shortcut and select Properties.
step 3
Ensure you are looking at the Shortcut tab, and click the Change Icon… button to bring up a pop-up window.
step 4
Click browse… and navigate to the folder that your .ICO files are saved in.
step 5
Select an icon and click open, then click ok on the pop-up windows below.
Desktop Icons
step 1
Right-click on your desktop and select Personalise.
step 2
Select the Themes tab. (on the left in Windows 10, in the middle in Windows 11)
step 3
Select Desktop icon settings. (On the right, under Related Settings in Windows 10 or scroll down the window in Windows 11)
step 4
A new window will appear, select the icon you want to customize and click Change icon…
step 5
Click Browse…
step 6
Navigate to the folder you have saved your .ico files in, choose an icon and click open. Click ok on the Change Icon window.
Step 7
Click OK to apply these changes.
Taskbar Icons
step 1
Right-click the app icon on your taskbar.
step 2
In the menu that appears, right-click the app and select properties.
step 3
Ensure you are looking at the Shortcut tab, then click the Change Icon… button to bring up another pop-up window.
step 4
Click browse… and navigate to the folder that your .ICO files are saved in.
step 5
Now choose your icon, click open, then click ok on the pop-up windows below.
(I found that in Windows 11 these icons would only update after restarting.)

Wallpapers
step 1
Right-click on your desktop and select Personalise.
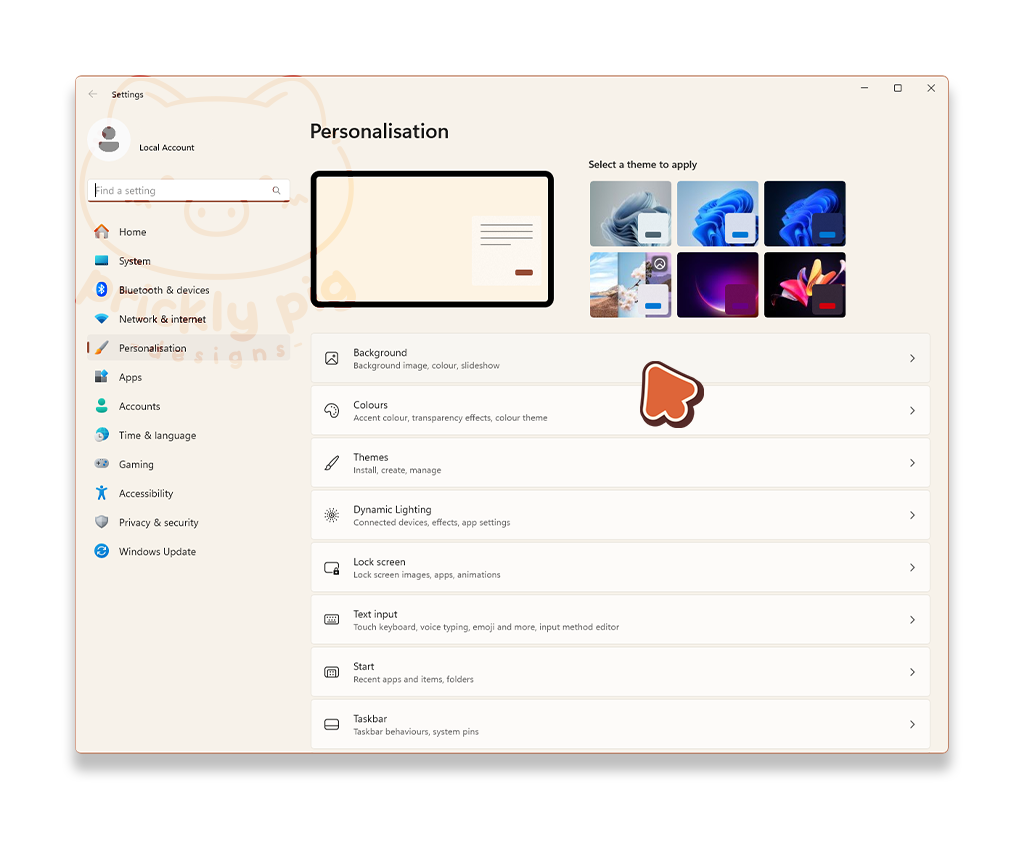
step 2
Click Background.
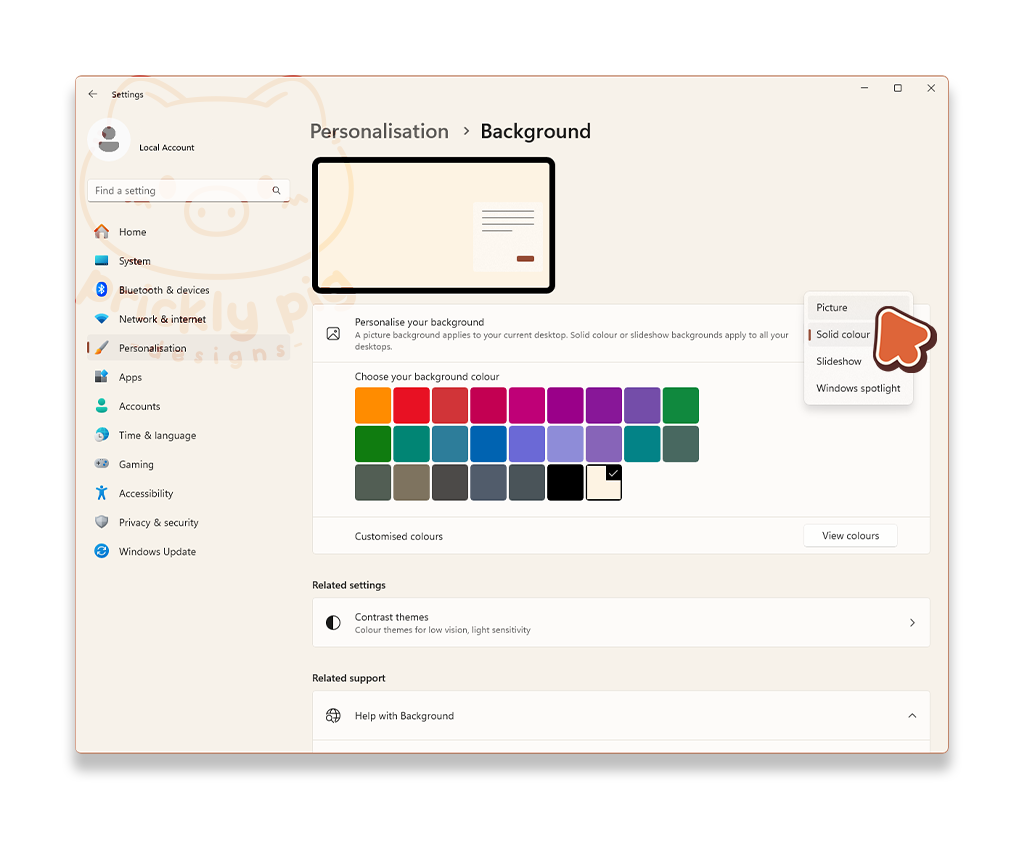
step 3
Beside Personalise your background there is a dropdown menu, select Picture from this list to set a picture rather than a slideshow.
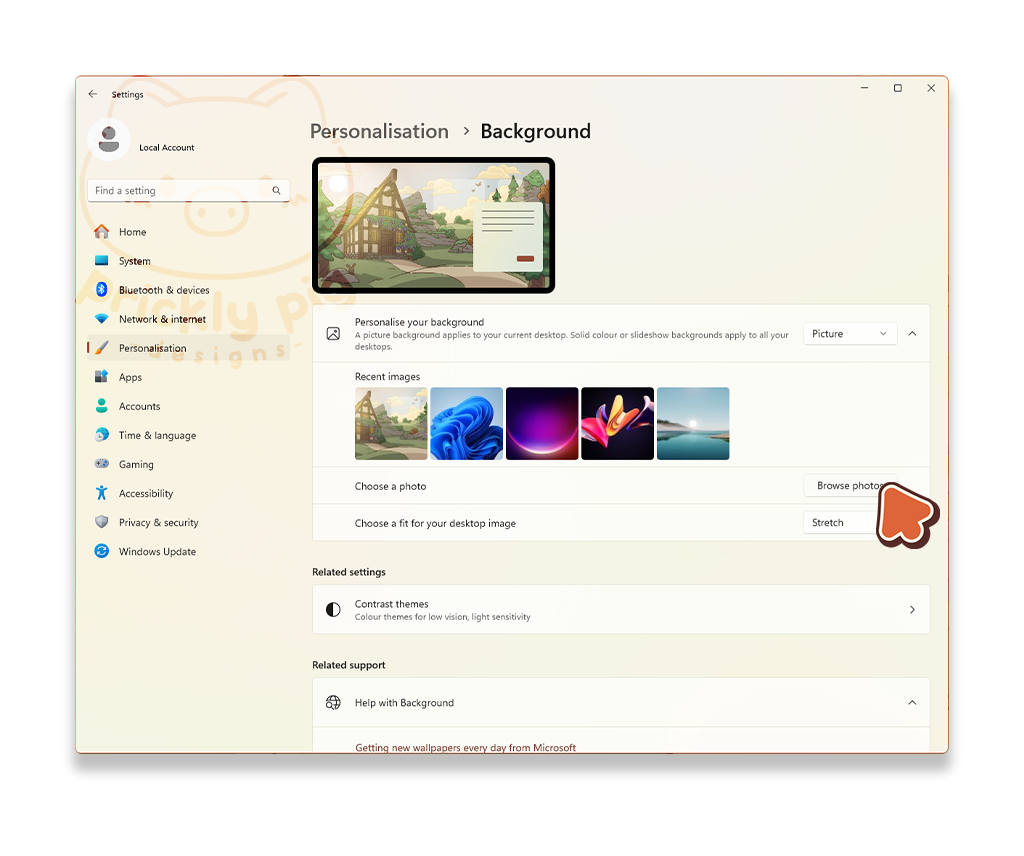
step 4
Beside Choose a photo click the button which says Browse photos.
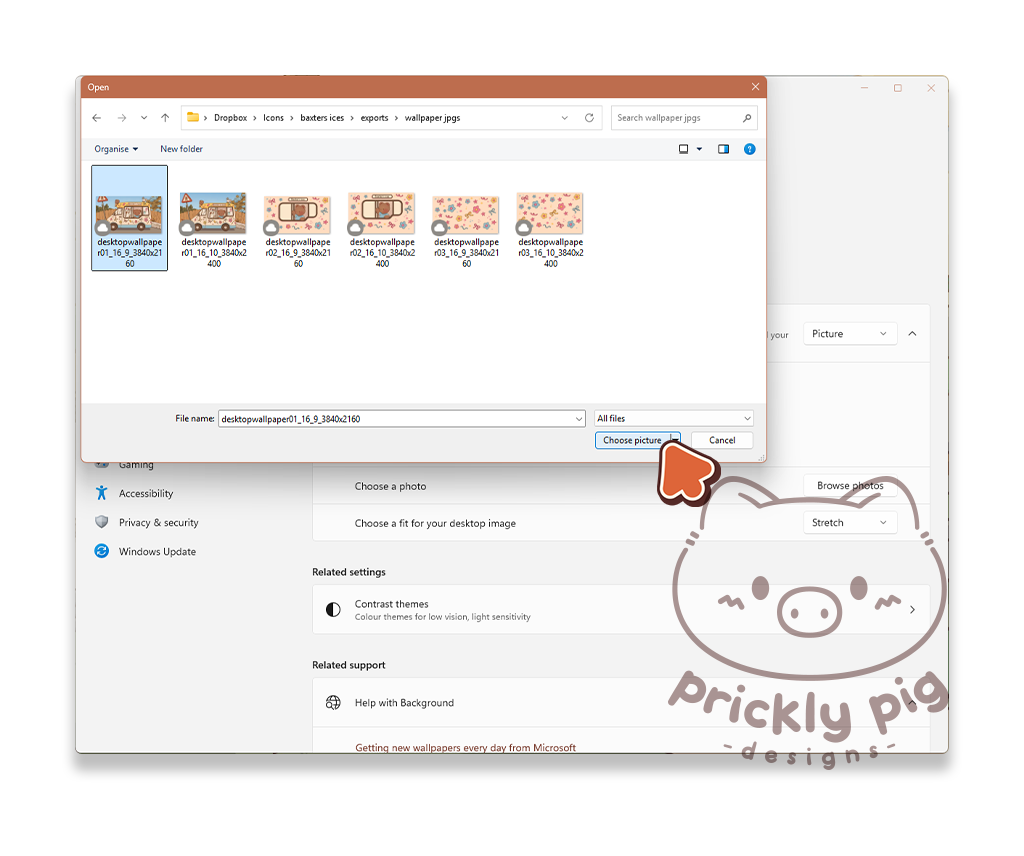
step 5
Navigate to your wallpapers and select an image then click Choose picture.
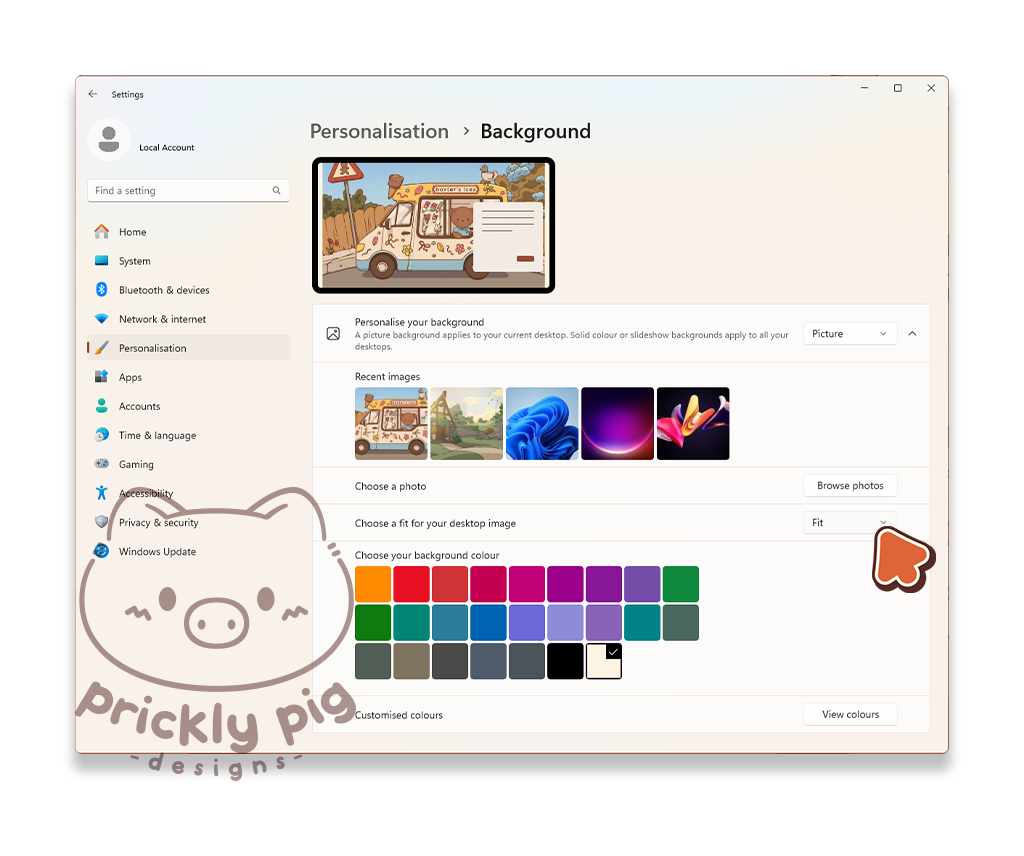
step 6
Beside Choose a fit for your desktop image select Fit from the dropdown menu. Fit means that the image won’t be stretched but will scale to fit the size of your screen.
Live Wallpapers
step 1
To set an animated wallpaper, I use an app called Lively Wallpaper which is a free and open-source software you can use to set up animated wallpapers and screensavers on Windows.
Install the Lively Wallpaper app from Lively Wallpaper.
I recommend installing Lively Wallpaper directly through the installer rather than through the Microsoft Store.
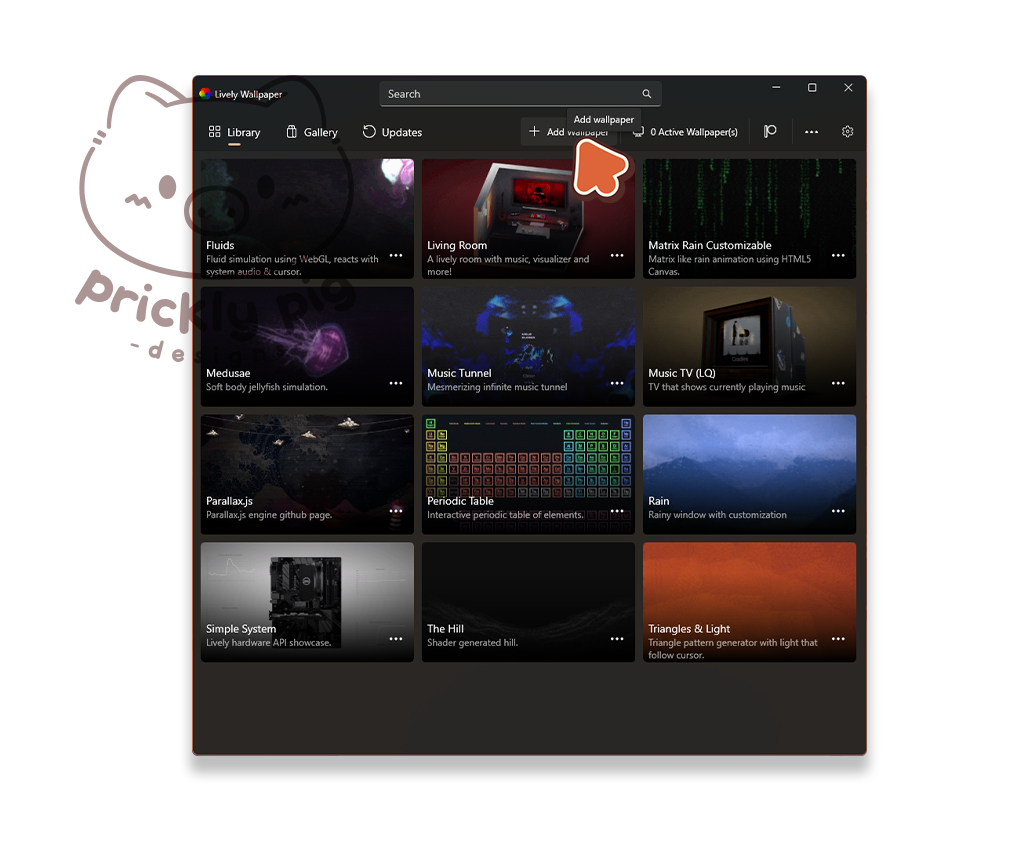
step 2
Open Lively Wallpaper and click "+ Add Wallpaper"
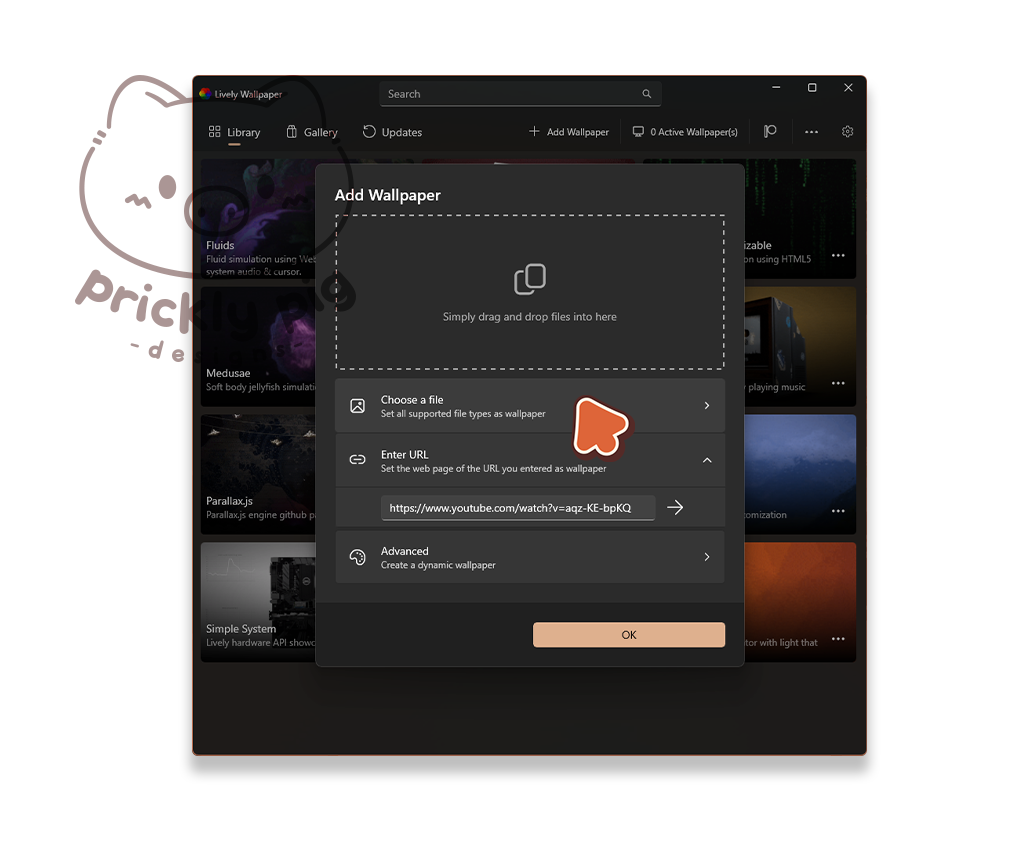
step 3
Click Choose a file.
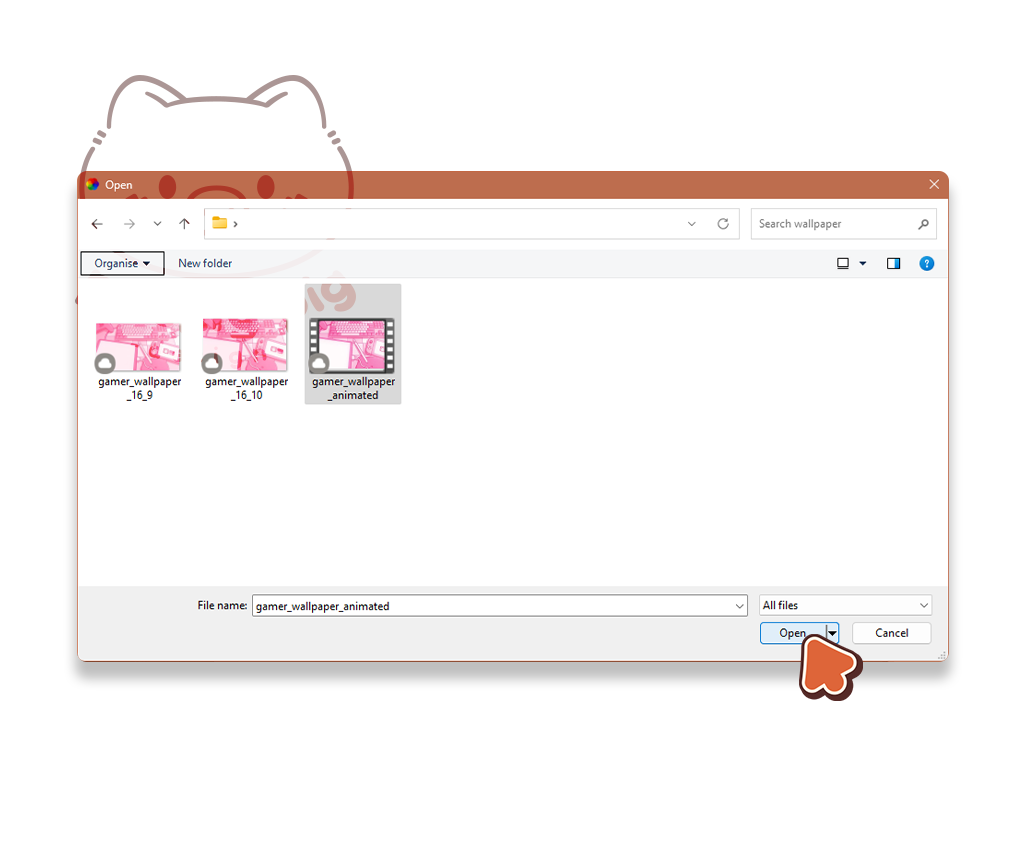
step 4
Select a video for your wallpaper and click Open.
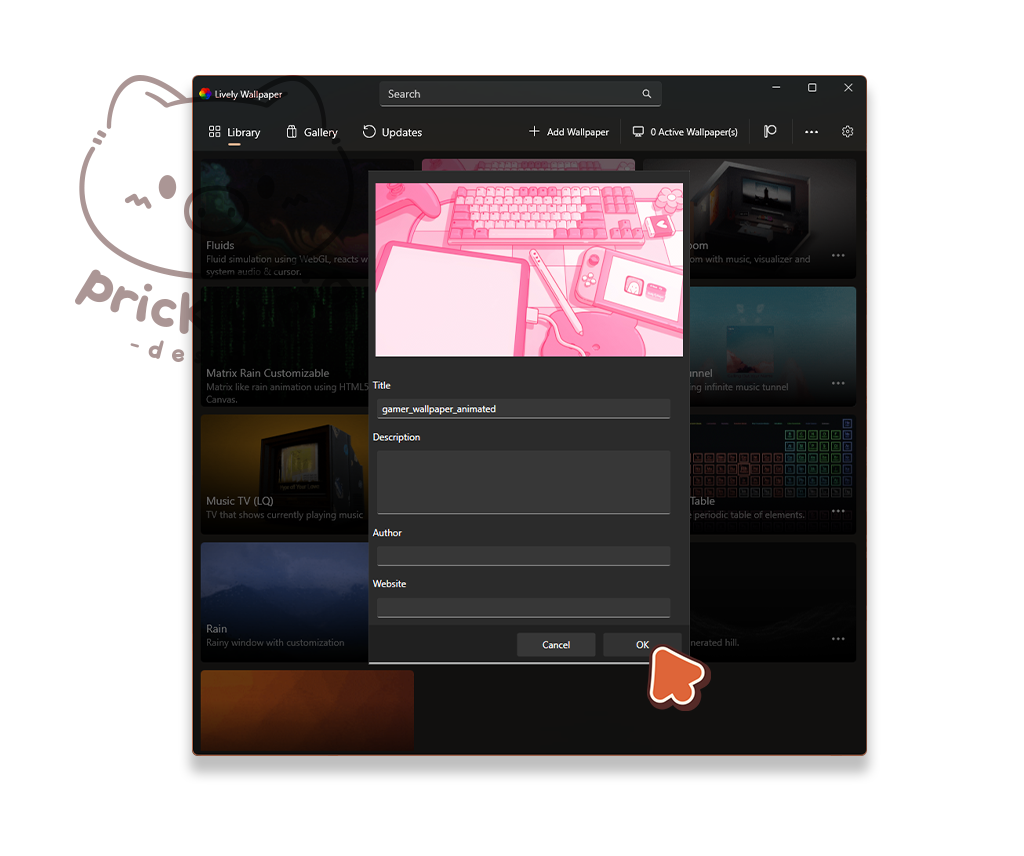
step 5
Click OK. This will apply the live wallpaper to your primary monitor.
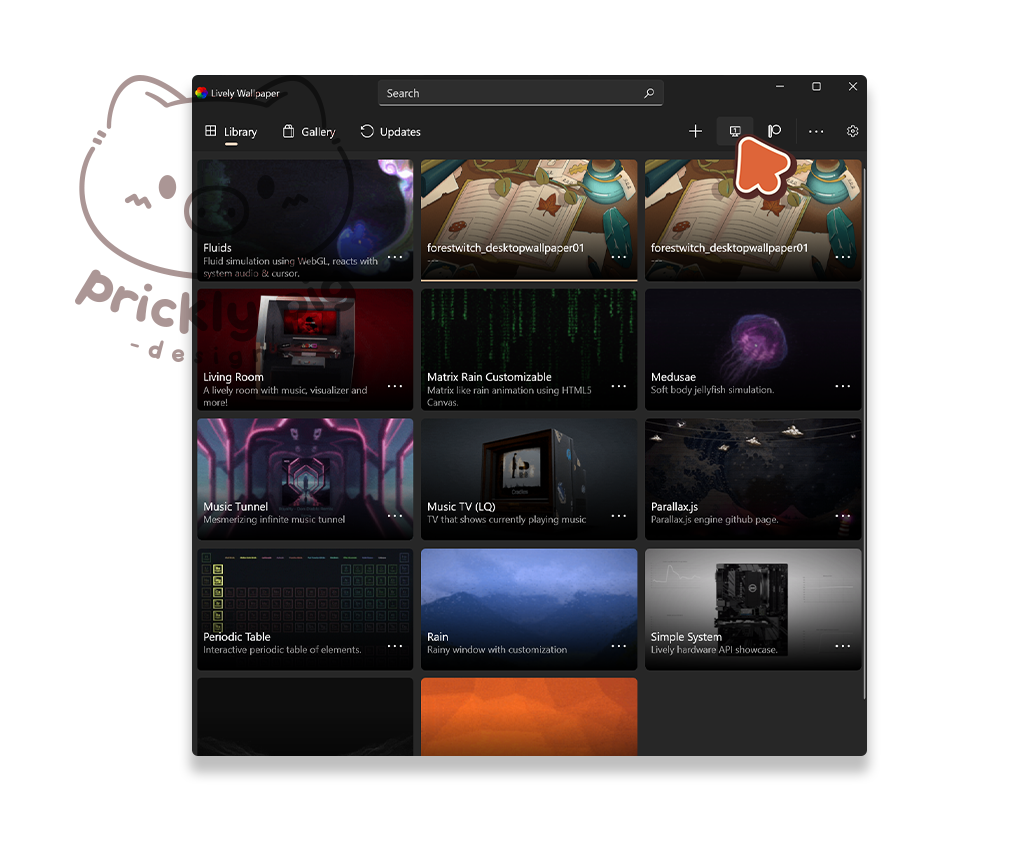
step 6
To remove the Live Wallpaper or apply it to a different monitor, click the monitor icon/"Active Wallpaper(s)" button.
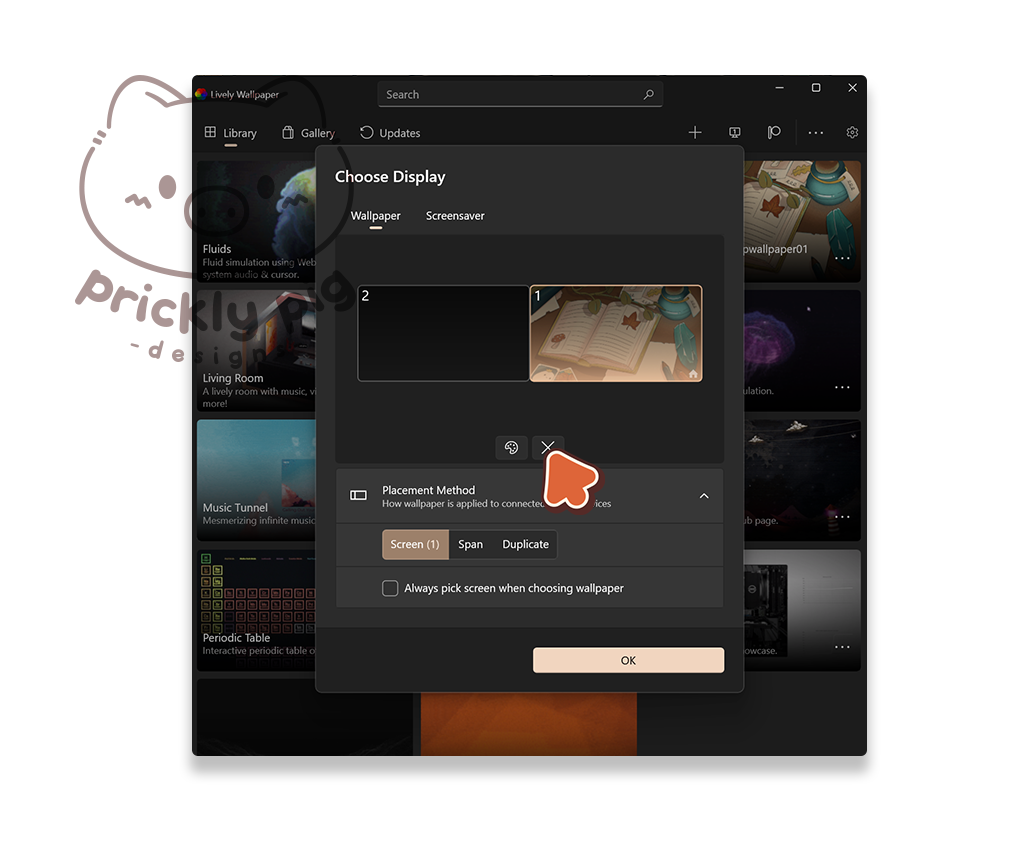
step 7
To remove the live wallpaper, click the X button.
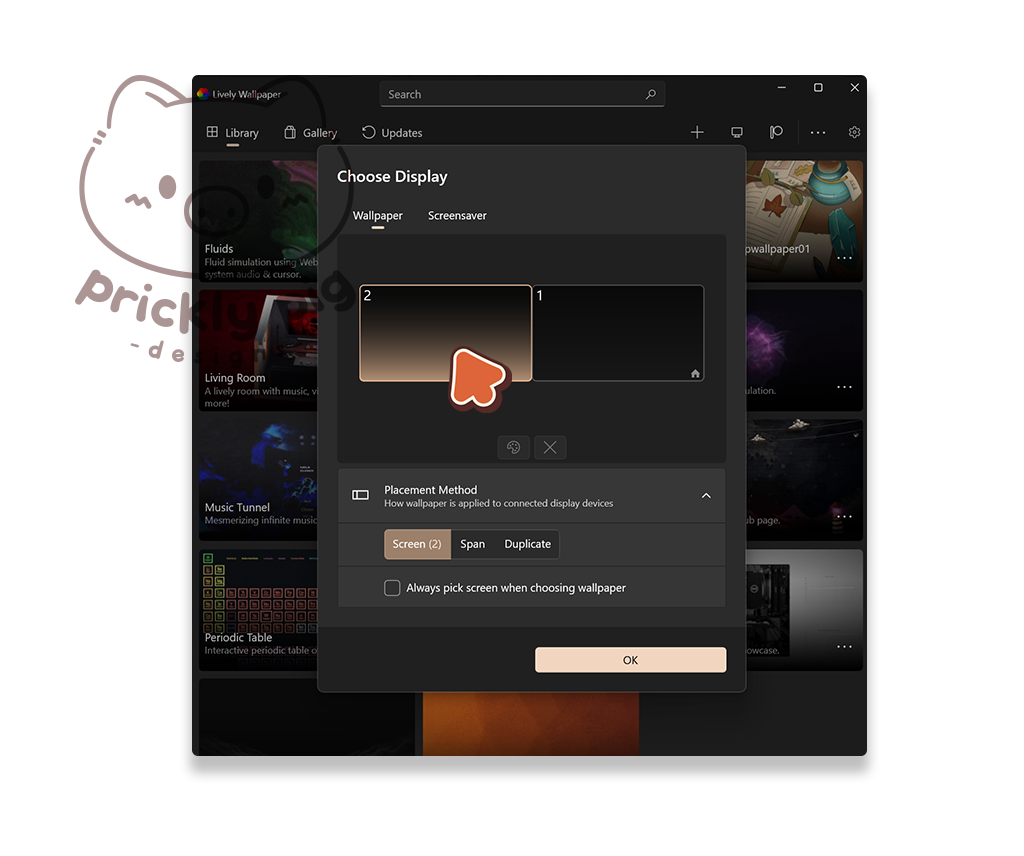
step 8
To apply a live wallpaper to a different monitor, click to select a monitor, then click OK.
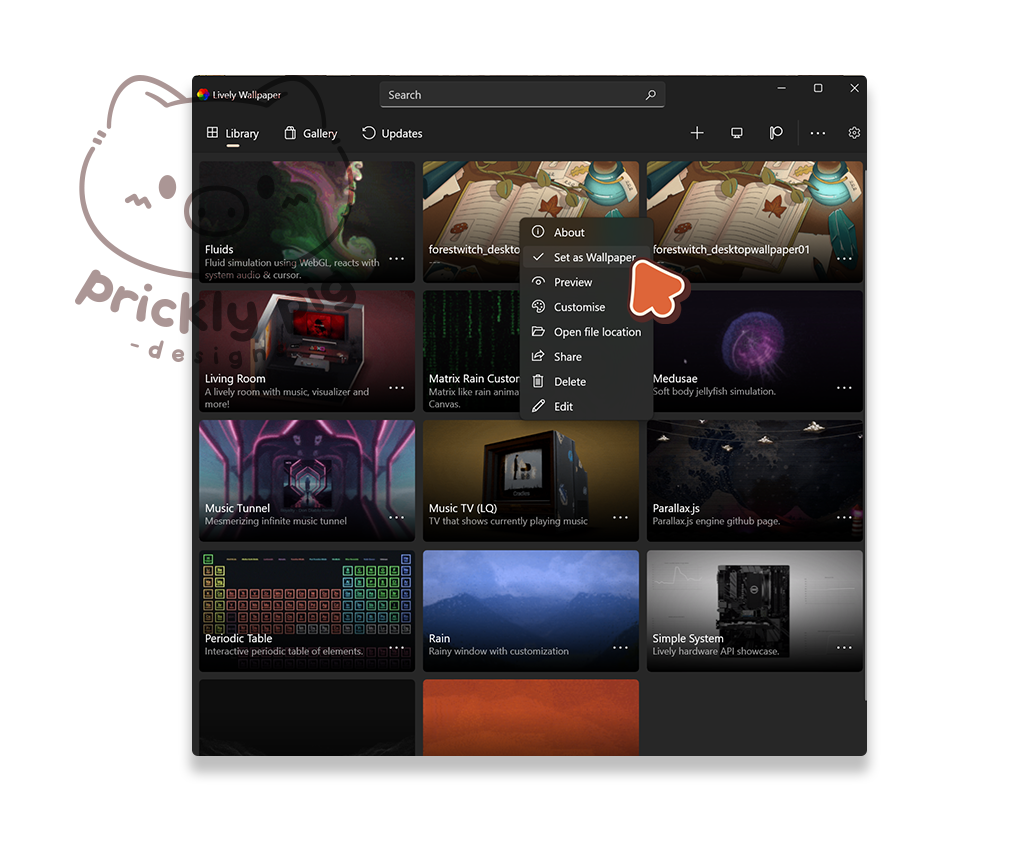
step 9
Right click on a live wallpaper in the library and select "Set as Wallpaper."
This will set the live wallpaper on the monitor you chose in the previous step.
Other Tips
Show or hide icons on your desktop
Right-click on your desktop view > show desktop icons to show or hide the icons on your desktop!
Align your icons (or not!)
According to your preference, you can have your icons unaligned and placed wild and free, or you can have them neat and aligned to a grid.
right-click on your desktop view > Align icons to grid
Resize your icons
Either in a folder or while on your desktop, hold CTRL and scroll with your mouse wheel to make icons larger or smaller.
Light/Dark mode
1. Right-click on your desktop and select Personalise.
2. Click Colours
3. Beside Choose your mode select either Light or Dark from the dropdown menu.
Quickly replace icons
Windows knows which icon to display for folders and apps by remembering the filename and location on your computer. If you overwrite an icon with another icon, using the same filename and location, windows will replace this icon with the new one everywhere that you have used it.
I use the same naming conventions for all my newest icon packs (any with the more simplified art style - Fantasy, Pink Gamer, ect). So, if you have previously purchased a desktop icon theme from me, and have customized your icons with these icons, you can paste over them to quickly replace and update your icons in just a few steps!
You will also need to install some software to quickly rename your files.
1. Download and Install PowerRename from Microsoft.
2. Navigate to the folder where your previous custom icons are saved. This will become the default location for icons that you are currently using, and I will refer to it as your default icons folder going forward.
3. Create a new folder within this folder to save your old icons (in case you want to use them later). Move the old icons into this folder.
4. Open a new explorer window and navigate to where you have saved your new icons.
5. Either copy or move these new icons into your default icons folder. (hold CTRL while dragging the icons to copy them)
6. Now we will rename these new icons to match the names of the old icons so that Windows knows where to find them. Select all of the new icons, right-click and select PowerRename.
7. In the PowerRename window, type the name of the new icon theme’s name (e.g. “fantasy”) in the first textbox and then type the name of the old icon theme’s name in the second textbox (e.g. “pumpkinspicedcafe”). Ensure you are using exact capitalisation. In the righthand panel, PowerRename will show you how the files will appear when they are renamed. You want the new icons’ names to match what the old ones were.
8. Click Apply when you’re done.
Now you have renamed your new icons to match the names of your old icons, windows will display the new icons wherever you used the old icons. This may take a little while to update as some icon’s will be cached, it may take a restart for some icons to update, especially your task bar icons.